Utilizando o modo trial de aplicações no Windows Phone
Veja neste artigo como utilizar o recurso que cria uma versão de teste do seu aplicativo para Windows Phone.
É essencial conhecer o recurso que é oferecido pelo Windows Phone para a criação de modo de teste da aplicação paga que você irá publicar, afinal, estudos comprovam que os usuários gostam de testar o aplicativo antes de comprar e ficam muito mais propensos a efetuar tal compra.

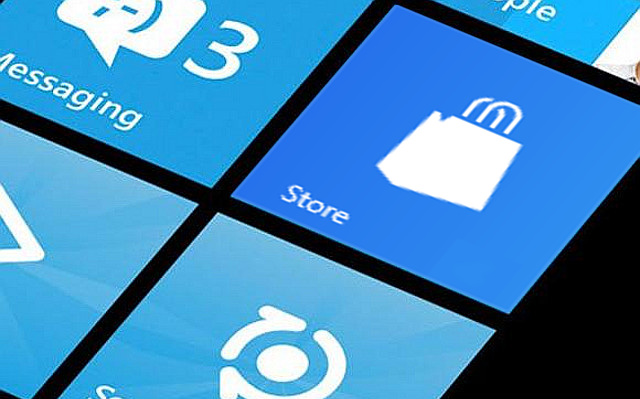
Figura 1: Windows Phone – Store Live Tile
Esse modo de trial é possível ser feito da maneira que você achar melhor, não existe uma regra clara para isso, então pode ser através do tempo de utilização por exemplo, ou então por nível, e também pode ser por funcionalidade.
Além de criar o modo trial do aplicativo, é bom você saber que deve-se facilitar ao máximo a compra do mesmo, incentivando sempre o usuário através de um botão no próprio aplicativo que leva à compra do mesmo. Neste artigo você verá um exemplo de uma aplicação em que as funcionalidades de um certo botão estariam bloqueadas até que a compra do aplicativo esteja efetuada.
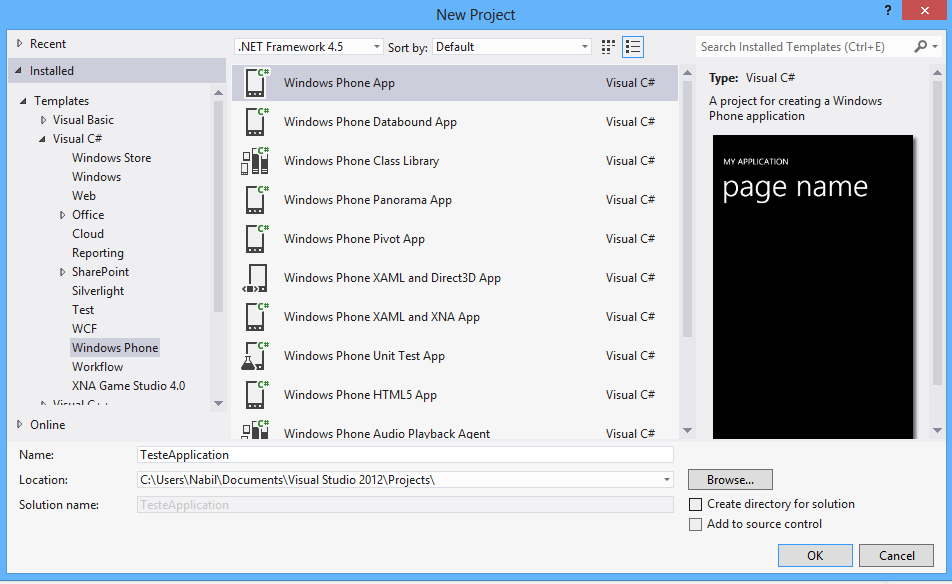
Abra o Visual Studio e crie um novo projeto conforme a Figura 2, com o nome de TesteApplication.

Figura 2: Criação do projeto TesteApplication no Visual Studio
Ao criar o projeto, é exibida uma caixa com a opção de escolha da versão do Windows Phone. Escolha a 7.1, pois assim o seu aplicativo funcionará em todas as versões de Windows Phone disponíveis.
Na página inicial haverá quatro botões, três deles para a escolha do nível do jogo, e o último para a compra do aplicativo. Então crie o StackPanel com esses controles dentro do ContentPanel, conforme a Listagem 1.
Listagem 1: Criação dos controles no Content Panel
<!--ContentPanel - place additional content here-->
<Grid x:Name="ContentPanel" Grid.Row="1" Margin="12,0,12,0">
  <StackPanel Width="450" Height="500">
    <TextBlock Name="lblNomeJogo" Text="Game Windows" FontSize="50"
    TextAlignment="Center" />
    <StackPanel Width="450" Orientation="Horizontal">
      <Button Width="150" Height="100" Name="btnFaseUm" Content="01" />
      <Button Width="150" Height="100" Name="btnFaseDois" Content="02" />
      <Button Width="150" Height="100" Name="btnFaseTres" Content="03" />
    </StackPanel>
    <Button Width="450" Height="100" Name="btnComprar"
    Content="Comprar versão completa" />
  </StackPanel>
</Grid>
Agora abra o arquivo App.xaml.cs e no topo da classe você deve adicionar a referência ao namespace Microsoft.Phone.MarketPlace, criar um objeto estático do tipo LicenseInformation e também deve adicionar um método chamado VerificarLicenca, para verificar se a licença no aparelho é demo ou completa, e também deverá modificar os métodos Launching e Activated para que o método de verificar a licença seja chamado. Veja na Listagem 2 como ficará a classe App.xaml.cs.
Listagem 2: Classe App.xaml.cs modificada
using System;
using System.Collections.Generic;
using System.Linq;
using System.Net;
using System.Windows;
using System.Windows.Controls;
using System.Windows.Documents;
using System.Windows.Input;
using System.Windows.Media;
using System.Windows.Media.Animation;
using System.Windows.Navigation;
using System.Windows.Shapes;
using Microsoft.Phone.Controls;
using Microsoft.Phone.Shell;
using Microsoft.Phone.Marketplace;

namespace TesteApplication
{
    public partial class App : Application
    {
        /// <summary>
        /// Provides easy access to the root frame of the Phone Application.
        /// </summary>
        /// <returns>The root frame of the Phone Application.</returns>
        public PhoneApplicationFrame RootFrame { get; private set; }
        public static LicenseInformation _licenca = new LicenseInformation();
        public static bool IsTrial { get; set; }
        /// <summary>
        /// Constructor for the Application object.
        /// </summary>
        public App()
        {
            // Global handler for uncaught exceptions.
            UnhandledException += Application_UnhandledException;

            // Standard Silverlight initialization
            InitializeComponent();

            // Phone-specific initialization
            InitializePhoneApplication();

            // Show graphics profiling information while debugging.
            if (System.Diagnostics.Debugger.IsAttached)
            {
                // Display the current frame rate counters.
                Application.Current.Host.Settings.EnableFrameRateCounter = true;

                /* Show the areas of the app that are being redrawn in each
frame.*/
                //Application.Current.Host.Settings.EnableRedrawRegions = true;

                // Enable non-production analysis visualization mode,
                /* which shows areas of a page that are handed off to GPU
with a colored overlay.*/
                /*Application.Current.Host.Settings.EnableCacheVisualization =
 true;*/

                /* Disable the application idle detection by setting the
 UserIdleDetectionMode property of the*/
                // application's PhoneApplicationService object to Disabled.
                /* Caution:- Use this under debug mode only. Application that
disables user idle detection will continue to run*/
                /* and consume battery power when the user is not using
the phone.*/
                PhoneApplicationService.Current.UserIdleDetectionMode =
 IdleDetectionMode.Disabled;
            }

        }

        // Code to execute when the application is launching (eg, from Start)
        // This code will not execute when the application is reactivated
        private void Application_Launching(object sender, LaunchingEventArgs e)
        {
            this.VerificarLicenca();
        }

        /* Code to execute when the application is activated (brought to
foreground)*/
        // This code will not execute when the application is first launched
        private void Application_Activated(object sender, ActivatedEventArgs e)
        {
            this.VerificarLicenca();
        }

        /* Code to execute when the application is deactivated
(sent to background)*/
        // This code will not execute when the application is closing
        private void Application_Deactivated(object sender,
DeactivatedEventArgs e)
        {
        }

        /* Code to execute when the application is closing
(eg, user hit Back)
        This code will not execute when the application is deactivated*/
        private void Application_Closing(object sender, ClosingEventArgs e)
        {
        }

        // Code to execute if a navigation fails
        private void RootFrame_NavigationFailed(object sender,
 NavigationFailedEventArgs e)
        {
            if (System.Diagnostics.Debugger.IsAttached)
            {
                // A navigation has failed; break into the debugger
                System.Diagnostics.Debugger.Break();
            }
        }

        // Code to execute on Unhandled Exceptions
        private void Application_UnhandledException(object sender,
ApplicationUnhandledExceptionEventArgs e)
        {
            if (System.Diagnostics.Debugger.IsAttached)
            {
                /* An unhandled exception has occurred; break into the
 debugger*/
                System.Diagnostics.Debugger.Break();
            }
        }

        private void VerificarLicenca()
        {
#if DEBUG
            string mensagem = "Nesse exemplo está sendo simulado a "+
 "implementação de um aplicativo Demo. Clique em Ok para simular o modo " +
"de teste, ou Cancel para utilizar a aplicação completa.";
            MessageBoxResult resultado = MessageBox.Show(mensagem, "Debug",
MessageBoxButton.OKCancel);
            if (resultado == MessageBoxResult.OK)
            {
                IsTrial = true;
            }
            else
            {
                IsTrial = false;
            }
#else
            IsTrial = _license.IsTrial();
#endif

        }

        #region Phone application initialization

        // Avoid double-initialization
        private bool phoneApplicationInitialized = false;

        // Do not add any additional code to this method
        private void InitializePhoneApplication()
        {
            if (phoneApplicationInitialized)
                return;

            /* Create the frame but don't set it as RootVisual yet;
this allows the splash*/
            /* screen to remain active until the application is ready
 to render.*/
            RootFrame = new PhoneApplicationFrame();
            RootFrame.Navigated += CompleteInitializePhoneApplication;

            // Handle navigation failures
            RootFrame.NavigationFailed += RootFrame_NavigationFailed;

            // Ensure we don't initialize again
            phoneApplicationInitialized = true;
        }

        // Do not add any additional code to this method
        private void CompleteInitializePhoneApplication(object sender,
NavigationEventArgs e)
        {
            // Set the root visual to allow the application to render
            if (RootVisual != RootFrame)
                RootVisual = RootFrame;

            // Remove this handler since it is no longer needed
            RootFrame.Navigated -= CompleteInitializePhoneApplication;
        }

        #endregion
    }
}
Agora abra o arquivo MainPage.xaml.cs e adicione a referência para o Microsoft.Phone.Tasks. Você deverá também sobrescrever o método OnNavigatedTo e tratar o evento de clique do botão de comprar, que disponibilizará ao usuário a opção de compra do aplicativo no Windows Phone Store. Veja como fica na Listagem 3.
Listagem 3: Código C# da página MainPage
using System;
using System.Collections.Generic;
using System.Linq;
using System.Net;
using System.Windows;
using System.Windows.Controls;
using System.Windows.Documents;
using System.Windows.Input;
using System.Windows.Media;
using System.Windows.Media.Animation;
using System.Windows.Shapes;
using Microsoft.Phone.Controls;
using Microsoft.Phone.Tasks;

namespace TesteApplication
{
    public partial class MainPage : PhoneApplicationPage
    {
        // Constructor
        public MainPage()
        {
            InitializeComponent();
        }
        protected override void OnNavigatedTo(System.Windows.Navigation.NavigationEventArgs e)
        {
            base.OnNavigatedTo(e);
            if (App.IsTrial)
            {
                btnComprar.Visibility = System.Windows.Visibility.Visible;
                btnFaseDois.IsEnabled = false;
                btnFaseTres.IsEnabled = false;
            }
            else
            {
                btnComprar.Visibility = System.Windows.Visibility.Collapsed;
                btnFaseDois.IsEnabled = true;
                btnFaseTres.IsEnabled = true;
            }
        }

        private void btnComprar_Tap(object sender, GestureEventArgs e)
        {
            MarketplaceDetailTask task = new MarketplaceDetailTask();
            task.Show();
        }

    }
}
Pressione F5 e teste a sua aplicação, que deve estar conforme a Figura 3.
Figura 3: Aplicativo em funcionamento na opção demo
Um abraço e até o próximo artigo.
Artigos relacionados
-
Artigo
-
Artigo
-
Vídeo
-
Artigo
-
DevCast
